Showing posts with label gridding. Show all posts

Sunday, September 23, 2018

Sketching from Photos Provided by Mickey Phelps

There is a Facebook group I follow called Legacy Nature Trails.  It is located on the other side of Leesburg and this group is made up of those folks who live in the gated community called Legacy.  Within this area are ponds and a nature trail the residents love to walk and take photos of the flora and fauna they encounter.

Often I see photos shared that I absolutely love and I'll write the person asking permission to sketch from their photos.  One such person is Mickey Phelps.  Yesterday he shared a group of photos taken of these ducks I've never seen before.

With kind permission, here are two of my sketches of Black Bellied Whistling Ducks.  I found them quite intriguing.


After I shared these with Mr. Phelps, he sent me another photo of one of their resident Bald Eagles.  A beautiful shot of this magnificent bird in flight.

This one was way more complicated due to all the detail in the wing.  My mind has trouble with a lot of detail because I want to include it all......having trouble seeing past all the detail for general shapes.  Being the case, this next one I thought best to use the grid method.  Even with that I found myself getting lost with wing detail and what went in which one inch square.........lol.  BUT, I stuck with it taking four hours to complete.


Using grid and 6B for line work and "color" 


Adding a background on separate layer should I decide to print off just the eagle to glue in one of my journal books and print of my digital work I keep in an Itoya presentation book.


The process:


Tuesday, July 24, 2018

Re-visiting Gridding

It took a long time for me to be interested in learning how to use the grid method to capture a subject.  The reason for my lack of interest was the long drawn out process of lightly drawing the grid on my paper and then trying to erase the lines without disturbing the drawing.  I find with digital sketching, I can use the grid method without the grid prep each time and having to erase.  All I have to do is include a pre-made grid layer (1 inch is what I like to work with), work on another layer and then just turn the grid off when done.  A great tool when you want something to be more precise rather than freely executed by eye and hand.

On computer screen I want to sketch on ipad........


Working the sketch......


Process on Ipad using HB and 6B pencil tools......


Ending Results.....


Friday, March 16, 2018

Portrait of Hany's Friend, Marianne - Using the Grid Method

A very dear friend who shares with me his art, his experience, and mentors me with my own efforts shared a sketch he worked of another of his dear friends by the name of Marianne.

With my practicing faces, I wanted to see if I could come close to capturing this beautiful young lady.

Hoping to come close to likeness, I chose to use the grid method.  Even with that, I have learned it's not just getting down the contour lines correctly but shading makes all the difference in the world for capturing likeness.

I'm still off but think I came close.  And with kind permission by both Hany and Marianne, I am sharing my experience/steps with you.


Thursday, March 15, 2018

Another Family Guinea Pig - Bob

While I'm still in the mood to practice faces, I continue doing so using family as my models.  I bounce back and forth between "eyeballing" and using a more precise guide of gridding.  This one is by the grid method.........at least for the face.  The rest I just worked in last and without the grid.

This is my brother-in-law who's presently in Canada on a ski trip with my father-in-law.  It's been a yearly ritual the family going some where to ski for a week.  We've been once just to be with family but that was years ago.


Sunday, March 4, 2018

My Sketching Me Sketching

Using Procreate, I worked this next sketch from a photo one of my friends took during one of our sketch outings.

This one was very time consuming to complete but it was fun and relaxing.  I wanted to capture proportions correctly and what better way to achieve that?  :-)

Procreate brush tools:  Inking - Studio Pen / Painting - Water Brush / Elements - Cloud


Tuesday, November 7, 2017

Various Works the Last Several Days

Here I'm catching up with what I've been doing the last several days.  Some digital, some watercolor, some graphite and ink.

This first was done in a small S&B Beta journal using a mechanical pencil.  It's a scull seen at Heather Oaks Farm Friday when our group met there to do some sketching.


Also from Heather Oaks Farm - graphite first and then mechanical pencil in a large S&B Beta


After sketching the chickens, I went online and sat and viewed Travor's video on painting hens and roosters.  I followed along after viewing a couple of times.


Digital sketch worked in Procreate and printed off on Fabriano 90lb Cold Press paper.  Then used watercolor.


One of the lady's in our sketching group last Friday.  From photo and using gridding method, worked this sketch.


Friday, October 27, 2017

2017 Inktober Sketches - Days 25 through 27 and Other

I've been on a roll with sketching the last few days.

Day 25 -  Photo taken at an old abandoned cemetery.  A section of wall that's still standing.  Not sure what the wall went to.


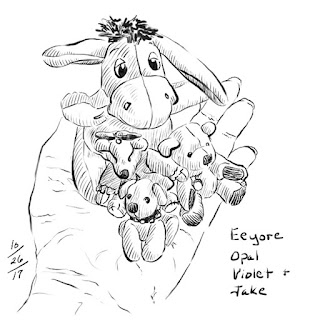
Day 26 - Opal sitting in a miniature chair I found at Hobby Lobby.  Experimenting a bit with different brushes in Procreate.


Day 27 - was up through the night so I sketched.  I decided to try stippling in Procreate.


Other sketches I've worked on.


This one printed off onto Strathmore Texture inkjet paper (which is 80lb) and applying watercolor.  Think I like the Epson Presentation paper better.  Although a heavier paper, it still buckles and the paper grabs the pigment like the Epson Presentation paper does.   I worked wet in wet for this to help move the pigment around.  Once dry, it's down to stay.


A few of my miniature critters.  Still working to improve with pen pressure.  Procreate went through a major update and it seems some of the brushes have changed or the pressure sensitivity has changed.  Of course it could be my imagination too........lol


Another I worked on through the night.  


And here's one I don't think I posted that I did earlier this month.  A paper twist Halloween witch I made almost 30 years ago.  Back in my craft making days.


I've learned too how to incorporate the gridding method of drawing within Procreate.

I can set a photo up on computer with a scanned grid overlay.


Next I can import a grid scan (I made different size grid/blocks on acetate that I scanned) to work in Procreate.  What's nice is I don't have to worry about pre-gridding paper with a pencil before sketching and then having to erase those grid lines completely or taking care not to ruin the actual sketch.


Here I've added a layer that I tried working what is called a texture brush so that it might look like it was on textured paper.  I still need to practice with obtaining the look I want.   

I'll print this out and add watercolor to it.....one reason I didn't add hatch shading to this.


I am really enjoying the Procreate software app.  The biggest plus to using this sketch app ........... I love the pressure sensitivity of the pen brushes that I cannot easily get with the fountain pens I currently have.  The closest two flex nibs I have just don't quite make it.  My Noodler's Creaper nib doesn't flex like other people who have the same pen/nib.  And my Falcon with the gold semi-flex nib is more or less a medium flex but you have to really press hard to get the wider lines.  Then you have the problem of damaging the tines, if too wide of a spread or working fast, the ink railroads on the paper surface.  If I want true flex ability, I have to use a dip pen and then you have to worry about dipping into ink frequently throwing your workflow off (at least for me), knocking the ink bottle over, ink blobs/splashes, etc. etc. (although I do like facing those challenges once in awhile as well.)

Working digitally is most definitely a nice change of pace giving a different feel and facing different challenges I'm enjoying.  I'm printing off everything I do and placing in an Itoya Presentation Book to have a flip through book just like you do with a journal book or sketchbook :-)

Sunday, May 7, 2017

Sketchcrawl May 6th - Unknown Bird Type

This is a sketch worked from a photo I took during the sketchcrawl yesterday at Elizabeth Evens Park in Mount Dore.  I have no idea what type of bird this is but wondering if in the Jay family due to the markings around the eye.  And also due to the blue in the body.  Maybe a female scrub or blue jay?

Working from my photo, I decided to do some practicing using the grid method rather than totally free-handing the pencil sketch.

Here are the steps I took:

Opened my photo in Photoshop Elements with grid view set up.  I like using the largest grid I can get away with so not to have too many blocks on paper to deal with.


In Journal (Stillman & Birn Beta), created a grid using very light pencil.  Then viewing the photo on screen, I placed little tick marks where each part of the bird intersected a grid line and also a few inside each block for prominent areas to help when line sketching.


Connecting the tick marks, I lightly sketched the bird.  (pencils lines darkened for illustration purposes)


Went over in ink using a Platinum Carbon desk pen and Lexy Gray ink.  Waited for the ink to totally dry and started erasing the grid lines.


Cleaned up erasing all pencil marks/lines.


Wet in wet, started adding color.  Used Black, Indigo, and Burnt Umber (all Daniel Smith watercolors)


The painting process for the rest of the bird was Indigo wet in wet, darkening some areas (under feathers) by dropping or brushing in Indigo as the paper was drying........still damp enough to bleed a little.

Once the Indigo was dry, I started dry brushing and blending Black.  Also added a little Bt Umber in the head at the top where the top of the wing overlaps.

After completely dry, gently brushed plain water in some areas of the back (randomly) and added a light glaze of the Burnt Umber.

Also lightly brushed water into the head and dropped a little Indigo making sure I didn't disturb the underlying colors (and lighter areas) already there.

I could have gone darker with maybe another glaze or two but it's been my experience that S&B paper to pill if too wet or too many layers applied with all the brushing.


Thursday, March 9, 2017

Homosassa Wildlife Park - Florida

After taking a break yesterday from doing any kind of sketching, I worked this playing with the grid method.

Stillman & Birn Beta / Lamy Safari / Lexington Gray ink
White is using a white Signo Broad pen

Using the grid method is definitely time consuming........at least for me considering I'm not used to using that method.  But it definitely helps with accuracy.  In ways it's relaxing taking one's time working one little square at a time only having to concentrate on a very small section at a time.  All you have to worry about with relationships between one part to the next are the few lines that go through each box.

For me it was like working a puzzle (which is another of my favorite past times) piecing together until it was all done and and then admiring the finished picture.  Not something I would do on a regular basis but after that challenge I was working, I was in desperate need of something totally different and thought this would be perfect.


Photo reference is from our trip to the wildlife park in Homosassa, FL this past Saturday.  Glorious day and a wonderful place to spend several hours!!!!

First I took the photo and cropped it to the same size as my journal page which is 5.5 x 3.5".  Then I removed the color using Photoshop Elements and a few other steps to achieve the look you see (to help with contrast separating the bird from background and seeing the posts better).  Then created the grid over top of the photo using a 1" scale.


Taking ruler, I lightly created the grid on my journal page using an HB pencil.....same scale

Proceeded to sketch in the bird and surrounding logs/stumps with pencil and then went over with pen and ink using my Extra Fine Nib Lamy Safari.


Once I was sure the ink was dry, I went back and erased all pencil lines and filled in any missing areas with pen and ink I noticed.


Finally, took watercolor to finish the page.


Friday, February 10, 2017

Quick Sketch Versus Using the Grid Method

For years I have wondered about using grids to capture subjects with more accuracy.  My problem was wrapping my head around all the prep work and then wondering how on earth to erase the grid lines without disturbing the drawing.

A friend who's like a sister to me out of the UK has used the grid method for years and I sit and drool over the portraits she turns out.  So I know for some people it works wonderfully and they are able to work around the two issues I have.

Finally I tried it but on a super small scale.  (This is actually my second attempt at using a grid although until tonight had totally forgotten about the first time.)  I'm still not sure about erasing remaining lines but it would definitely take a lot of preliminary work to set up before actually drawing.  My wish is to draw portraits of my family at some point and feel that even with all that prep work, it would definitely be worth investing that time to get the accuracy I would hope for.

Here's comparing a quick sketch of a lady versus taking my time and using a grid.  The illustration pretty much speaks for itself.


UPDATE:

Filled in some background and tried removing as many of the grid lines that I could.  Should have done that before shading in the background...........would have made things easier.  Good learning experience though :-)