Saturday, January 25, 2020

Set of Four - Bird Figurines

These sketches were worked from a set of four resin chickadees I ordered through Amazon.  I love birds in general but Black Caps are one of my favorites to watch at the feeders.  Also love their chatter sound.  When I came across this set in Amazon, I couldn't resist purchasing them.  And, once received, I just had to sketch them.  The figurines are of high quality and very detailed...not to mention, just plain adorable :-)

I chose to sketch these using hatching and fan type tick hash marks.  I wasn't in the mood for messing with color but at a later date, I might make prints that I can add a light color wash to the bodies.   This was fun and very relaxing with the repetitive marks.


UPDATE:  Adding a splash of color.  


Friday, January 24, 2020

Few Days of Sketching and Painting

As I had hoped, working on my Ipad earlier this month seems to have helped jump start me back into sketching/painting.  At least the last few days I've managed to feel motivated in ...

Doodling on scrap paper just using a ballpoint pen:


Hatching and stippling sketch in Procreate (stippling one dot at a time the old fashion way):


Quick wet in wet watercolor sketch - FIbook75x75:


Graphite sketch of robins that are passing through as they start their journey up North - FIbook75x75:


Thursday, January 23, 2020

Think I Prefer to Seal and Glue

Today I am trying an alternative to sealing my mini prints and gluing to glass and bezel trays......2-sided Sticky Sheets.  My initial thoughts based on my first experience:

Pros: 

1)  No need to seal prints

2)  No messing with glue

3)  Crystal Clear - no yellow tone (at least at this point)

Cons:  

1)  A real pain pulling the thin coverings protecting the sticky tape.  It's extremely difficult getting started.

2)  No wiggle room trying to line up with glass or print and if not careful will grab the print if you're not holding one corner of it.  The tape is so sticky that even if a very small corner or edge grabs what you want to stick it to, it is there to stay....no chance to make adjustments or realign.

3)  Even if you're sure your print or glass has no dust on the surface, the tape pulls from the air any particles while in the process of attaching it to surface.

4)  Difficult, even when burnishing, to remove any air bubbles.


At this point, my thoughts are:  I'd rather stick with the time and effort it takes to seal each print and just glue pieces together.  This may change after I have tried a few more times.


With these I'm attaching ribbon where they can hang from the ornament tree off same hooks as the key chains sitting lower.  

*The oval bezels are double sided so I'll be able to put a miniature print front and back.  Nice for this purpose of displaying using the ornament tree.


Monday, January 20, 2020

Time to Sketch - Star Fruit

When I reach the point my inner critic starts picking things apart in what I do....feeling the need to change things... it's time to return to sketching.

This is a star fruit (or starfruit - not sure on the spelling) our neighbor gave us.  I had never seen nor heard of it before so I was looking forward to trying something new.

One itsy bitsy bite was all it took to realize it was not for me!  What a horrible taste it left and I couldn't wait to eat something to mask or remove that taste!!

After doing some research, I learned this fruit has lots of nutritional value; however, can be toxic to some people.  Those with kidney disease should not eat it.  Those on medication should talk to a physician first as it's like grapefruit with negative interactions with some meds.  AND, for some people can cause neurological problems resulting in seizures, confusion, and even death.  Not exactly something I liked learning and actually thankful I don't like it.


FIbook75x75 sketchbook / Daniel Smith and QoR watercolors / Platinum Carbon Pen with Noodlers #41 Brown ink.

One of our Resident Squirrels

Not sure how long this will last but I seem to be on a bit of a roll.  I went for the last couple of months lacking motivation and I'm surprising myself with what I've done this month so far.

It's so much fun watching the squirrels outside my window.  It's a game of sorts with these cunning creatures trying to stay one step ahead of them when it comes to the bird feeders.  Or finding ways to keep them from climbing on the roof and finding ways into the attic.  But even with the challenges we face, I love watching them. 

This is from a photo I took last summer.  I pulled the photo up on my computer screen and worked the drawing on my Ipad using Procreate.  I used the airbrush soft tool, technical pen, and a flowing or fine hair tool.  I'd make a few marks and then use the smudge tool just touching here and there to depict the fur.  Other times I'd use the eraser to "lift" color and then blend the surrounding colors to soften the edges of the erased marks.

This was a lot of fun to do and didn't take me as long as I thought it would.  When I first started, I had no idea how I would work the fur.  I made a few trial and error marks first as I worked through and decided on which brush tools to use.  It definitely took some thought process and testing before I found what worked for me.

Being the perfectionist that I am, I could easily pick this apart and find areas I could improve on but I'm calling it done.  :-)


Sunday, January 19, 2020

Banana Flower

We have yet to really get a taste of these bananas that grow in our back yard.  They are much smaller than what you get in the store and really don't turn yellow.  Not sure what type they are or if they are even good to eat.  By the time we remember to time it when they are ripe (which we're not sure when that time is), they are gone.

From photo of one of the flowers and immature bananas last year.

Procreate / Airbrush brush tool (soft)


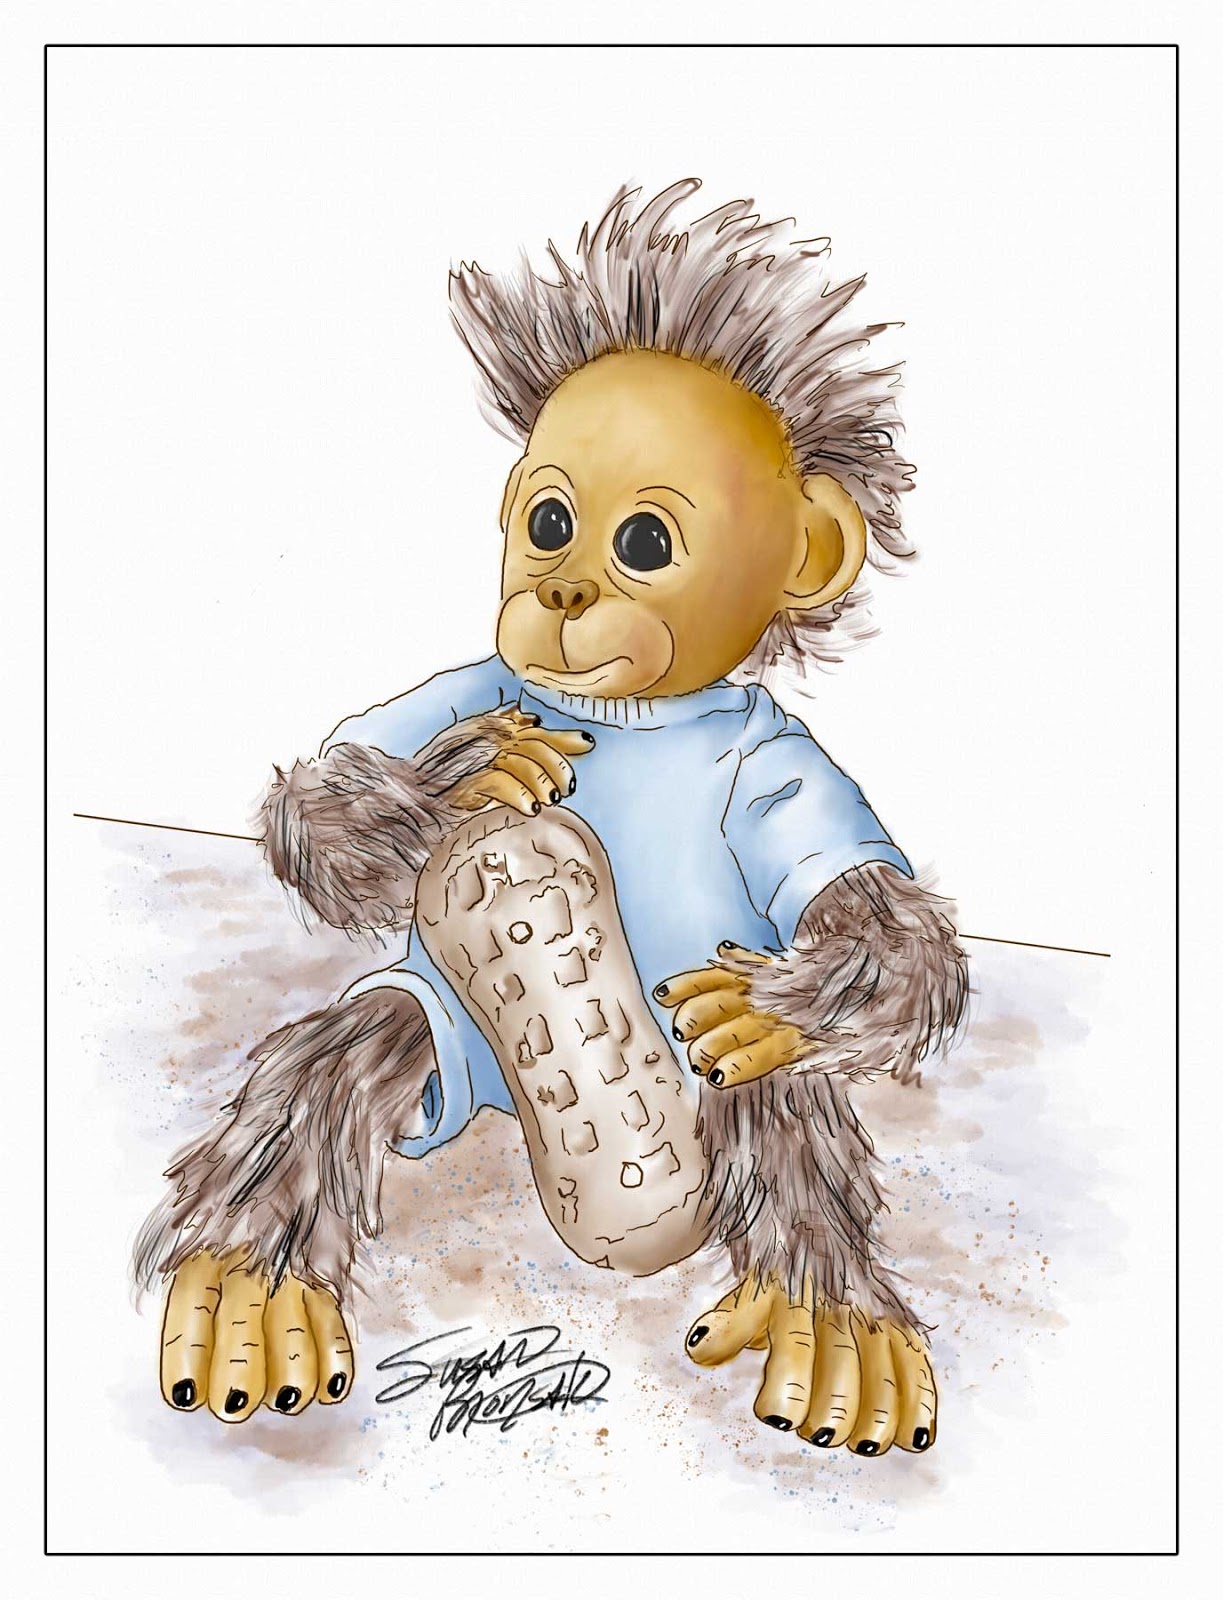
The Other Half of Double Trouble

A few posts back, I shared the female baby orangutan that makes up the collector set "Double Trouble."  Last night I worked on her brother.

This one I worked a little differently from how I worked her.  Used brown for the line work instead of black.  Used a few other brush tools, as well and varied the color of the skin from what I used on the sister.


The two together...


Saturday, January 18, 2020

Miya's Toy - Different Look with Color

Today I decided I wanted what I did yesterday in color.  One of the positives in working digital AND working everything on separate layers is the ability to work from ALMOST scratch.  In this case creating a new file with a copy of the initial line drawing and building on top of that working color in separate transparent layers.

Another bonus with the layers and digital is trying various color combinations or brush tool/patterns to see what works and what doesn't.  As an example, I had worked the cast shadow in different colors - three separate layers...a bluish gray, purplish gray, and brown.  I didn't care for the blue or purple so I just deleted those layers.  I did similar with the background working one with a soft blue and the one you see here.  Didn't care for the blue.

Today I played with a brush tools I haven't used too much, which is the 2B Compressed Charcoal brush tool.  I also used Gesinski Ink and Splatter brush tools for the table.   I was after a soft plush look and the Compressed Charcoal did the trick for me.


Steps showing how each top layer is used to render the final results:


Friday, January 17, 2020

One of Miya's Christmas Gifts

A few years back we tried wrapping a few things to see if Miya would open on her own.  When she was younger, she couldn't be bothered but that has changed.

Now she looks forward to her gifts and takes care of unwrapping on her own..........making the best scattered mess you can imagine with torn paper.  So funny to watch.

What's even funnier is the fact she somehow knows which gifts are hers and we have to set them back under the tree where she can't get to them.  This year after she opened her three gifts, she was like a little kid watching us open ours and waiting for more of her own. 

When the box came in from Chewy, I immediately opened and wrapped her gifts.  She never saw them but, again, she somehow knew that box had goodies in it for her.  She sat glued in the same spot watching my every move.  Then followed me to the tree and tried her best to get to them.  She sat and stared, would come and do her "I want something" whimper, and return to the front of the table that holds the tree....looking back and forth at me and the tree.  Some days she'd not think about it but then some days I would catch her nosing around the tree.  She's always the first to open her gifts before we start.

Anyways.........one of the gifts was this soft "trunk" with three baby chipmunks.  It's a hide and seek toy where you put the babies inside and dogs pull them out.  This is Miya's favorite.  It's about half her size and so funny to watch her carry it around with or without the babies tucked inside.


Thursday, January 16, 2020

Still At It - Resin and Bezel Trays

I can only do so many at a time with all the steps involved and limited space on the tray I have to use to set these up on.

It's a definite and works quite well, sealing with Mod Podge first.  Two coats on the front and two coats on the back allowing drying time between coats.

After waiting at least 24 hours following the last layer of Mod Podge, I pour the resin over the front.  If I plan to place in a bezel tray, I do not flip and repeat on the back.  Not all will go into trays and with those, I will flip and repeat the resin pour and then while set but still pliable, I will drill a hole for a jump ring to be placed.

Resin pour, covering with dust cover, and allowing to set for twelve hours.


Top left - those I have sealed and still need resin.  Top right are still those I need to seal before doing anything else.  Top middle are those with resin I will probably flip and cover in resin for jump rings later.  Far left and far right of the key chains are my test pieces sealed using Matte Fixable Spray (which I will not use again due to how it darkens or changes the color of each piece) or one I didn't seal at all.  Key chains are being used as interchangeable frames for mini art.  For now I am not setting the miniatures permanently in each tray allowing me to change out other miniatures from time to time.


Method of Displaying.


Sunday, January 12, 2020

First Full Drawing of 2020

Yesterday I actually started a fresh drawing in Procreate.  I worked another one days ago but was color only added to a line sketch I had previous done some time ago.

This is one of two in a set of collector dolls Terry gifted me at Christmas called Double Trouble.  I'll work on the little "brother" next.

Brush Tools Used:  Water brush, Airbrush Soft, Dry brush, Stipple brush, and Technical for the line drawing.

The subtle background is a combination of a canvas texture and crackle texture I created in photoshop elements and imported into Procreate.  I stacked the two patterns and used multiply to make each layer transparent for the texture look.


This other is the line drawing I finally decided to add color to.  A paper twist doll I made many years ago.

Basically the same brush tools minus the dry brush.  Added color to make a mini 2.5 x 3.5 print for magnets.  Background is a copy of a textured watercolor paper I scanned for this purpose and imported into Procreate.


Thursday, January 9, 2020

Photo Key Chain Using Resin

Now this was more or less a success!  The trays can be added to key chains or other type hooks as zipper pulls or charms.

This is using one of the test pieces where I sealed the inkjet print with mod podge and then poured resin over it to create a nice dome.  For now it's just sitting in the tray as I await glue to arrive to put it in permanently.

Because I wasn't sure if I'd place glass over it in the bezel or add a resin dome, I had rounded the corners of the print.  Next time I will probably not round the corners unless I definitely plan to add the glass over the print.

I really like this resin that I purchased from little-windows.com.  It levels beautifully and crystal clear and smooth.  I was fortunate with the domed pieces as none had any bubbles to worry about popping or removing as it set (I must have done something right...lol).  Biggest plus............no odor.


Trial and Error with Resin - #2

This miniature inkjet print was "glued" to a piece of glass using resin as my "glue".

My initial plan was to add this to a bezel tray that the glass came with but decided instead to add a self-adhesive magnet (sheet) to the back.

As seen in the photo, there are gray spots either from bubbles I didn't catch or due to the fact I didn't seal the print first.  I won't know the answer to that until I repeat with a sealed print.  I think I already know the answer but need to verify that to be sure by trying again.

Results and what I think I should do with the next attempt:


Tuesday, January 7, 2020

Trial and Error with Resin

Another idea I'm working on is printing off tiny charm or jewelry size prints of my illustrations.  Mostly in bezel trays and some without.  I've never worked with resin so this is a work in progress with trial and error.

First try is printing off on Epson Ultra Premium Presentation paper miniature paintings about the size 1" x 1 3/8'  using my Christmas gift from hubby - Epson XP 15000 photo printer.  That's taking some playing as well as I learn what it can do on various papers.  The prints came out beautifully.

Next is using different methods of sealing the prints so that the resin doesn't cause the ink to bleed (to include a test seeing what happens if not sealed).

Two prints I chose to seal with Blair's Matte Fixable spray that I use all the time spraying graphite drawings and watercolor paintings on Aquaboard.  It has always worked great so I thought it would be perfect to seal the inkjet prints.  I notice they are taking on a darker tone.

Three prints I chose to brush on Mod Podge Gloss-Lustre-Lustre with the red label with two coats.  As hard as I tried to get a nice even coating, you could see slight brush streaks even after dry.

The resin I am using is from Little-Windows.com.  I purchased their starter kit to see if it would be something to continue with or go a different route.  Too soon to decide at this point but may be more involved than I care to deal with.

After mixing and pouring the resin over each, it didn't take long to start seeing the effects.

First Time Results:

I will not be using the Blair Fixable Spray as it darkens the paper turning it a buff color.

Those with the Mod Podge remained white and clear.  The brush streaks don't appear to be as noticeable but I'll have a better idea late tonight or tomorrow when I can examine it closely and under good lighting.

And forget skipping the step of sealing the inkjet prints.  The resin caused the ink to bleed giving the piece a pink tone and washed out image.

Mod Podge definitely wins this round.  I want to try Sakura 3D Clear Lacquer once it gets here :-)

Once the 12 hour waiting time is up, I want to repeat the resin on the back of the top three I'm using as experiments and then test out drilling holes at the top for jump rings.   The other three I will probably place in bezel trays I have to make keychains


Monday, January 6, 2020

Working With Previous Sketches and Paintings

One of the things I deal with from time to time is asking myself why I bother doing what I do.  I don't sell, show (well outside of sharing on the internet), or compete, but instead, do this for myself with the main reason being therapeutic in nature.  Sometimes, that reason is just not enough to keep me inspired or motivated.

There ARE times I will take something I've done and have it printed off to hang but I'm not real big on hanging pictures on the wall.  Or, I might upload to Shutterfly for coffee cups, key chains, or standing tiles for family gifts.  Other than that, my artwork resides inside journals sitting on a shelf.....seldom ever taken down to look at.

A dear friend shared what she does with some of her work.........creating gift and note cards.  She also makes photo charms (mini paintings in bezel trays and lacquered over) using hooks along with embellishments like beads, buttons, etc.  She finds ways to enjoy and share her work or display outside her journals.

Because I've been in such a funk with sketching or painting, I have struggled setting goals for 2020.  So in the meantime, I thought I could try and do something with what I've already created.  Maybe that might help inspire me into what I might want to do this year.

Inspired by my friend, I have decided to create note cards and magnets using previous illustrations I have sketched/painted in my journals (or Ipad).  Next I want to try my hand at taking printed miniatures and covering in resin (in or out of bezel trays).  Maybe then I can get past this "why bother" mode I'm stuck in and move forward :-)

This is just a very small sampling of the note cards I have created so far.  They are the size of RSVP or invitation cards.  I can use these for personal use and/or give as gifts.  The paper I am using is Hammermill Color Copy Cover 80lb weight paper.  I can fit two note cards per sheet of paper.  Envelopes and sleeves I found through ClearBags.com.


The magnets are being used to decorate file cabinets and personal size refrigerator/freezers we have.  They are ATC size (2.5 x 3.5") placed in magnetic photo sleeves.  Paper I'm using (for now) is Arches Infinity Museum Quality Digital Art & Photo Inkjet paper.  Unfortunately, it's no longer available, which is a major disappointment as I loved the texture of the paper and what I have always used for art prints.  My understanding is that Canson now sells similar paper but it's just not the same according to forums I've read where other people are in search for an alternative to their beloved Arches Infinity.  Thank goodness I have a couple/few boxes of this paper left.  As for the magnetic photo sleeves...........I used to get packages from Walmart but found others on Amazon I think are a little better quality.


Tuesday, December 24, 2019

Third Time's a Charm

Getting ready for Christmas and restocking our freezer, Terry made two trips to the grocery store.  First trip was to Winn Dixie (we like their meats better) and second trip to Publix.

Our freezer's drain plug had frozen up causing a build up of ice at the bottom and during the defrost cycle would leak out onto the floor.  We used up all that was in the freezer before turning the unit off to clear the ice and unplug the drain line.

Our grocery list was quite large and one item I needed was my butter spread.  I use something totally different from Terry plus he was baking cookies and needed stick butter as well.  First trip he forgets my butter spread but no biggee.........he can pick it up when he goes to Publix.  Second trip he forgets it again.  He made sure he had his and what he needed for baking so it's not like he wasn't already in the area where mine is located.  Needless to say, by this time, I was feeling a little agitated.  He had to make yet another trip but this time, not only did he get my butter, he also surprised me with this bouquet of flowers.  As he walks through the door, he says "third time's a charm."  Poof..........my agitated state was gone.......ha ha.


Tucked in this arrangement of flowers were four or five rose buds and one in particular called out to me to sketch.  I liked how one petal stuck out further than all the others.

Procreate sketch on a canvas background.


Monday, December 23, 2019

Birds at Feeders

Although we really don't have much of a winter here with plenty of bugs still hanging around and flowers still growing, we do get a lot of traffic at our bird feeders.  We can go for a long time between refilling the feeders during the summer but during the winter, it's like every other day or every two days.

One of our non-regulars is this guy.........what I've been able to identify as a Yellow Throat Warbler.


Another we don't normally see at the feeders through the summer months.  Various type finches to include this one.


Due to putting things away prepping for family time during the Holidays, I've been working on my Ipad.  I'm using the same three basic brush tools I find I enjoy using most.........Technical pen brush, waterbrush tool, airbrush soft tool.  I use these either placing color down, for blending, and for erasing.  In other words, I normal use the same brush tool blending and erasing as I do with putting down marks with.

Procreate drawings with a watercolor paper background.

Tuesday, December 17, 2019

Playing on My Ipad - Procreate

Any time I want to escape for a long period of time, all I have to do is grab my Ipad and work with Procreate.

When I sketch in a journal or sketchbook, I feel free and don't worry too much about getting everything perfect.  But when I work in Procreate, I am with a different mindset.  For me it's an alternative to oil painting which I cannot do for various reasons.  I guess for me.......the Ipad is more like a canvas for more formal work versus the sketchbook.

Digital painting for me takes a lot of time due to how I work.  I work in MANY layers with little rough marks at a time blending as I go.  I work on small sections at a time and each layer has the different values of colors.  And I use small brush sizes which also takes a bit of time to fill in areas with how I work.

In the time I take to work something like this, I sit and study what I've done already and where I might want to go next.  I'll do a rough line drawing on a separate layer trying out placement of different things to see how it might fit in with what I've already done.  In other words I plan as I go.

This took several hours and I enjoyed every second of it.  I was in no hurry and my mind was lost in what I was doing and that at times is a Blessing :-)


Sunday, December 15, 2019

This Year's Christmas Card

After sketching and painting a few other of our plush tree ornaments, I decided to put these guys together for a Christmas Card.  These have been a lot of fun to work with.

FIbook75x75 / Lamy pens with Doc Brown ink / Stonehenge Aqua / DS watercolors


This is my wish for everyone viewing, to have a Merry and Blessed Christmas.  To be safe during travels; to enjoy without a lot of pressure or stress; to embrace this time with family and friends.  For those who are alone and may not be able to spend time with family or friends...........just know that there ARE people out here who think of you and send warm heart-felt wishes your way!


Friday, December 13, 2019

Mixed Media - Graphite Sketch Plus Digital Coloring

I thought I would play a bit with the last pencil sketch I worked of the standing fabric pencil cup.  Not wanting to add actual color to the sketch, I decided to import into Procreate, add color, and export back to my computer.  Now I have both a graphite sketch untouched by color and a color version either for digital viewing or printing off and adding to the journal.

First thing I did was erase all the writing.  Added color in layers and then inserted a photo I took of a blank page in a handmade sketchbook with rough textured paper.

One of the things I love about procreate is the blending of colors.  In ways it's like working with oil paint without the mess and fumes.

Wednesday, December 11, 2019

Standing Soft Travel Pencil Case

A new pencil case that stands on its own.  Second type I've tried and I love them both.  This one has the top portion that slides down into an open cup for easy retrieval of contents and then slides up to close with zipper.  Love the variety offered with colors and patterns.  I prefer these over glass jars or coffee cups I tend to use.......always fearing I'll knock one off the table and it shatter.

Purchased from Jetpens.

Quick pencil sketch in Stillman and Birn Beta sketchbook using Graphgear 1000 mechanical pencil .7 (gifted to me by my sons for my birthday in Oct).


Friday, December 6, 2019

Carved Santa Ornament

Last year my youngest son, Travis, went on a service call where the lady had several of these out on a table that she had made.  During the time he was there, he showed a real interest in her carvings and talked about art mentioning I sketched and painted and have for years.  He shared where I started out painting on wood and gradually changed course into what I do today.

When he was finished with the work he had to do, the lady gifted him (as a special thank you) with two Santas........one an ornament and one free standing to sit on a shelf.  She sent two so that he could give me one.

Travis gave me the shelf sitter and then the ornament as his gift to me to keep as a set.  I absolutely LOVE these hand carved Santas!!!  Something I might like to explore to learn to do on my own.

Although I've sketched these carvings before (last year), I wanted to do so again as a graphite sketch. 

I wasn't sure if I wanted to add color because I wanted it to look like a graphite sketch and maintain a rustic look.  I feared messing it up adding color.  I mulled over that decision throughout the day and then decided to go ahead and do so reminding myself if I did the sketch once, I could do it again if I needed to.

Because the ornament is the main topic, I chose to only emphasize it with color and leave the hand alone.

FIbook75x75 / Stonehenge Aqua / Pental Graphgear 1000 .07 mechanical pencil / DS watercolors


Wednesday, December 4, 2019

New Golf Cart

Several of our neighbors have purchased golf carts to ride around in the neighborhood.  It's common in The Villages here in Florida but not so much in the other areas that are not designed as retirement communities.  The Villages is a self contained, very large retirement community (made up of several different style villages, actually) where people use their golf carts to go everywhere to include shopping.  They have dedicated lanes to drive, which is really unique.

Those here in our neighborhood basically just use theirs to get out and ride around our neighborhood.  We've been considering one and finally took the plunge and purchased this green one.............perfect size for my miniature bears.

Tried to sketch it finding it very difficult to get the perspective right.  No big surprise to me as that's one area I struggle with and I doubt will ever change.  I get lucky once in awhile but for the most part, I'm always off somewhere.   I came close to just giving up on it but stuck it out until I at least achieved what you see here.  By the time I inked in the lines, I was kind of bored messing with it wanting to call it done but decided to at least add some color to the bear. 

FIbook75x75 / Stonehenge Aqua / DS and QoR watercolors / Lamy with Doc Brown ink


Sunday, December 1, 2019

December Challenge Between Friends

I was struggling with a challenge idea for December.  I had several written down on post-it-notes but all entailed a lot of thinking before jumping in.  With my going through this sketching lull, I didn't feel I had the energy to put so much thought into or be creative. 

After working the one ornament yesterday, I came up with the idea to sketch 3 to 6 items related to Christmas.....either as individual doodles or put together in a setting or composition.  I chose putting several together that told a story using another of the plush ornaments I have on the tree as my model.

FIbook75x75 / Stonehenge Aqua / Lamys with Dark Green, Dark Red, and Doc Brown inks


Plush Christmas Ornament

Trying to get back into sketching, the ornaments on my tree came to mind as possible inspiration.  There are six plush ornaments that have little sacks you can place goodies or money in.  This is one that jumped out at me right off.

FIbook75x75 / Stonehenge Aqua / Lamy with Doc Brown ink